How To Install A Solid-Surface Backsplash
Installing solid-surface backsplashes is not only for functionality but can improve the aesthetics and overall design of your kitchen or bathroom. Backsplashes are vertical extensions to a counter surface to protect the wall behind it against water splashes or cooking splatters. In addition, backsplashes vary in material types, for example, the cost-effective peel-and-stick tiles to the more expensive glass types.
Solid-surface backsplashes are typically easy to install and clean as they have minimal or no seams where dirt can accumulate. However, installation difficulty and cost may vary depending on the material used. For example, the laminate sheet is the easiest and glass the most difficult to install.
Backsplashes usually are easy to install within a few hours with minimal effort. However, general and specific guidelines are required to enable a successful backsplash project. In addition to choosing the best backsplash type, other questions may arise, such as how high it should extend vertically. Secondly, which is the best installation method for your chosen backsplash?
Methods To Install Different Solid-Surface Backsplashes
Solid surface backsplashes come in various types, colors, and patterns and can complement your bathroom or kitchen. They are typically non-porous and made of synthetic materials to ensure damp protection and easy cleaning. Examples of DIY-installation solid-surface backsplash materials are granite, quartz, ceramic, porcelain, glass, beadboard, and tile.
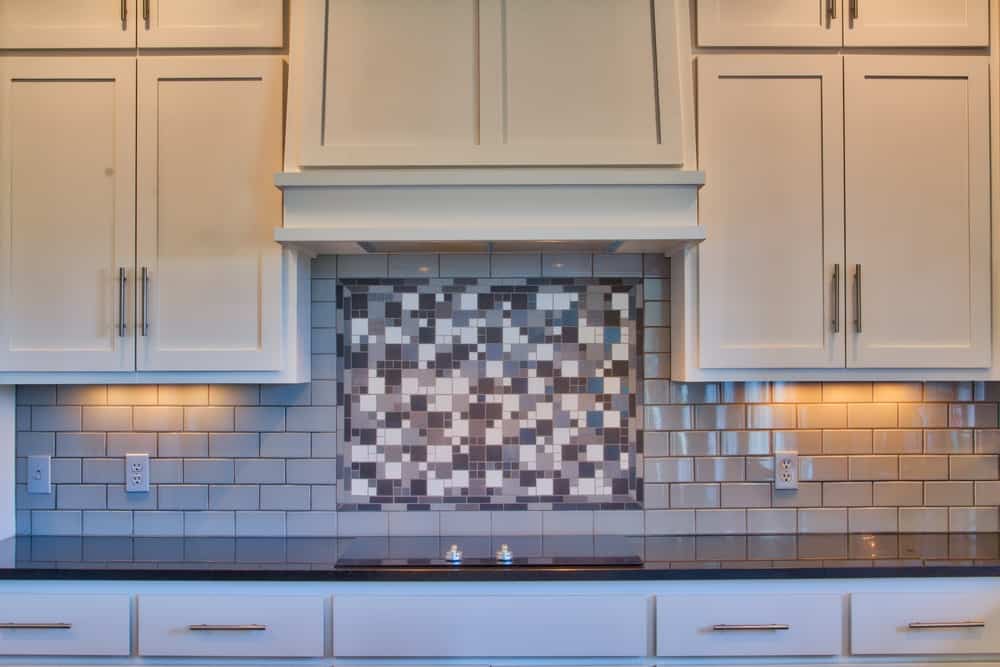
Ceramic tiles are a popular kitchen backsplash option as they are versatile and come in various patterns, shapes, sizes, and colors. A stove backsplash protects the area behind the stove from grease, and cooking splatter should be of durable, nonabsorbent material. In addition, tile backsplashes made of ceramic, porcelain, and glass are some of the easiest to clean.
Some vanity tops have integrated backsplashes, but most marble and natural stone tops require an installation of a separate backsplash. Backsplashes can be a few inches high or can extend to the ceiling. Traditionally, kitchen and bathroom projects require technical expertise; however, installing backsplashes can be ideal for a do-it-yourself project.
Lastly, always install or build the counter first and install the backsplash afterward, as you want the caulk to seal that line where they meet. In addition, the height of the countertop may be different from what you planned, and it would make the countertop installation more difficult when you install it last. Also, installing granite tops may damage your backsplash.
Installing Solid-Surface Sheet Backsplashes
Laminate sheets are an excellent example of a pretty design look that covers the total backsplash area horizontally and vertically with minimum or no seams. Because the wall area behind a sink and stove normally gets splattered with grease or steam, the continuous larger laminate solid-surface sheets are best for backsplashes. Glass, countertop laminate, and stainless steel are examples.
Other solid surface sheet backsplashes are quartz, stone, and any material typically used for countertops. Solid surface countertop materials are usually ½ – inch thick but are perfect for a backsplash if available in a thinner ¼ – inch thickness. In addition, laminate and glass backsplashes are pretty doable as a DIY project.
Using A Laminate Solid-Surface Sheet As A Backsplash
Professional artisans install most sheet backsplashes, but if you are a typical average handyman, you should be able to manage a successful laminate backsplash installation. Laminate is the easiest solid-surface sheet material for the DIY backsplash installer.
- If you need extra-long laminate sheets, you should be able to get 10-foot sheets at countertop distributors, as local home centers usually only stock the 8-foot long sheets
- For vertical applications, ensure the material is bonded to sufficient density particleboard of at least 3/8 – inch thickness
- Attach the sheet to the wall with adhesive or screws
Using A Glass Solid-Surface Sheet As A Backsplash
Glass is more difficult to install than a laminate sheet for backsplashes, but again, an average DIY person will be able to complete the project successfully.
- Depending on the required size, it may be an expensive choice for a backsplash
- Transporting a large sheet of glass may be problematic
- For a colored glass effect, use spray paint to apply several coats to the back surface of the glass
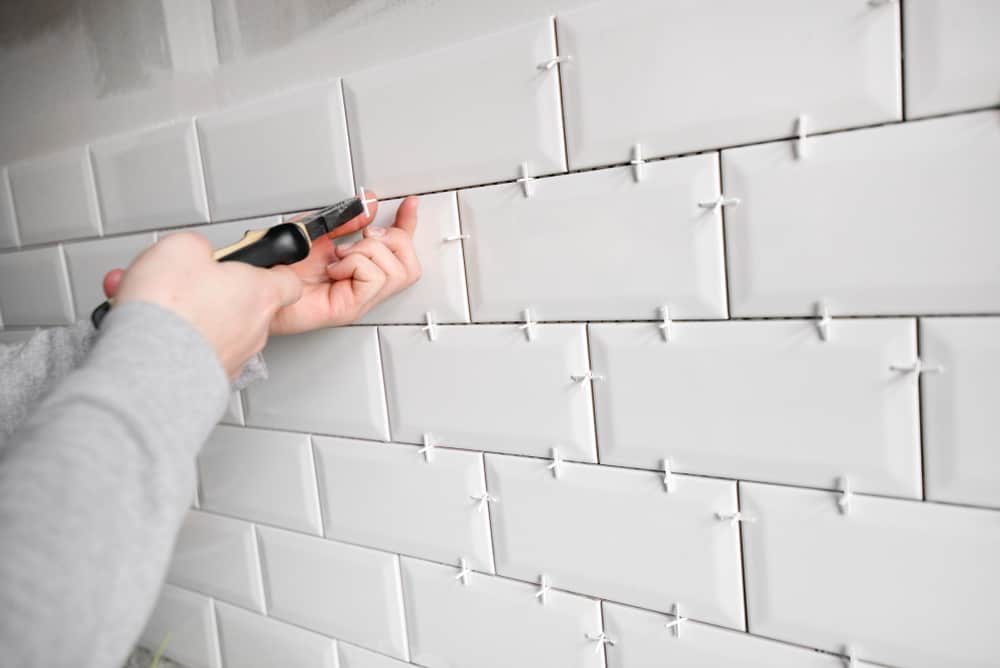
How To Install A Backsplash Using A Solid-Surface Sheet
Sheet backsplashes are the opposite of tiled backsplashes, which may have grouted seams and therefore will collect dirt and requires extensive cleaning from time to time. In addition, solid-surface sheet backsplashes may be a cheaper option.
- Ensure the wall surface is clean
- Draw a level line as a reference and level point on the wall
- Measure the area for the backsplash
- Remember to use the same height on open areas as those areas that have upper cabinets
- Build a template from plywood and cut small manageable strips and tape them together on the wall
- Glue all the strips together and ensure to mark possible cutouts clearly on the template
- Transfer the template to the solid-surface sheet by tracing around its outside edges
- Mark possible cutouts on the backsplash surface
- Cut the backsplash according to the traced transfer lines
- Dry-fit the backsplash on the wall
- Apply adhesive to the sheet
- Mount the backsplash and allow it to set
- Attach any trim around the edges
Installing A Solid-Surface Backsplash To A Vanity Top
To install a solid-surface backsplash on a vanity or countertop, you need a cloth, all-purpose cleaner, sandpaper, construction adhesive, painter’s tape, caulk, and paper towel. This method is also suitable for any traditional backsplashes with some modifications depending on the surface area or backsplash type.
- Sand and clean the wall area ensuring it is free from dust or any debris
- Spread the construction adhesive on the back of the backsplash, ensuring you cover the whole surface
- Fit the backsplash against the wall and adjust it to line up with the vanity counter
- Apply pressure to the backsplash to set it against the wall and wipe away all excess adhesive
- Stick painter’s tape on the vanity top and the backsplash where they meet and leave a ½ – inch gap
- Open the caulk tube and cut the tip at a 45-degree angle
- Seam the area between the vanity and the backsplash with the silicone from end to end
- Use a dampened paper towel and draw it along the caulked strip to push the caulk into the seam
- Remove the painter’s tape from the backsplash and vanity top
- Do the same for the side edges of the backsplash if needed
- Allow the silicone to dry for at least a day
Installing A Wooden Solid-surface Backsplash
Bathroom backsplashes are normally more purposeful to cater to dampness and moisture. In contrast, kitchen backsplashes rely more on décor and less on functionality as it is more visible. Therefore, kitchen backsplashes play a big part in the overall design. Tile backsplashes are more common, but there’s no reason that you can’t use wood if it fits the decor design.
However, one disadvantage of wood is that it’s flammable, which makes it not ideal to use as a backsplash behind a stove. Typically, fire codes dictate a distance of 18 inches from the stove’s back burner to the backsplash.
How To Install A Wooden Backsplash
Step 1: Decide and mark the backsplash area to be fitted
Step 2: Remove electrical outlet covers if applicable
Step 3: Prepare the wall area by wiping it clean
Step 4: Measure the backsplash area
Step 5: Cut the wooden backsplash to size and provide for electrical outlet cutouts
Step 6: Seal the wooden backsplash with a durable sealant or stain
Step 7: Apply wood adhesive to the wood surface
Step 8: Fit the backsplash to the wall
Step 9: Replace the Outlet Cover Plates
Conclusion
Solid-surface backsplashes come in different materials and are a typical good choice for a backsplash. The main reason is that they are relatively easy to install and have little or no seams. However, depending on the material, installation difficulty and cost may vary.
References
- https://www.thisoldhouse.com/kitchens/21016448/how-to-install-a-solid-surface-backsplash
- https://www.thespruce.com/know-about-sheet-backsplash-4126684
- https://www.msisurfaces.com/blogs/post/2017/01/18/mosaic-monday-backsplash-tile-installation-issues-and-solutions.aspx
- https://www.houzz.com/discussions/2618529/backsplash-before-countertop-installation