How Do You Build A Patio Without Digging?
There is nothing like having a BBQ in your backyard and enjoying the day with friends and family, but the one thing that can spoil the day is not having a place to put the table, chairs, and BBQ. I recently wanted to install a patio in my backyard, but I didn’t want to dig out the ground for the base. So how do you build a patio without digging?
While most patio styles require you to excavate the ground for laying a proper base, some patios don’t require you to dig. You can remove the topsoil to make leveling the ground easier and use paving base panels and paving stones to create a raised patio. It is an easy DIY project.
I had no idea how to build a patio without digging and had to contact a contractor to see if it was possible. After researching the idea, I found a few options if you don’t want to dig up your yard but still want an elegant patio that is easy to maintain. I thought I would share my findings in this post.
How To Build A Patio Without Digging?
If you want a less expensive, quicker, and easier way to build a patio, you can build a patio using paving base panels instead of gravel for a base. Paver base patio panels are lightweight and easy to install. They don’t require a lot of labor, digging, or hauling stone and soil.
Traditional patios have the first 6-inches of soil excavated to create a stable base for the patio. It is more labor-intensive, and you need over two tons of gravel to complete a basic patio base. Using paving base panels saves time and money and doesn’t need to dig extensively. Here are the steps to building a patio without digging.
What You Will Need To Install A Patio Paver Base
Using patio paver base panels doesn’t mean you don’t need to prepare the ground where you will build the patio. There are a few steps you need to follow to get the ground ready for the paver base. Below is a list of all the materials and equipment you will need:
1. Non-Woven Landscape Fabric
The first material you will need is landscape fabric. It’s essential to use landscape fabric because the fabric acts as a barrier to keep the soil from mixing with the sand. It’s best to use non-woven landscape fabric because it allows the surrounding soil to absorb water.
Woven landscape fabric is not porous enough to allow water to absorb into the soil underneath the patio, as it acts more like a plastic liner and leaves you with which means that the water gets trapped and you will have a puddle underneath your patio. It can cause the ground under the patio to shift. Ensure the landscape fabric you pick has at least a 20-year life span.
2. Paver Base Sand
While you will not be digging, you will need to remove the topsoil of the ground and prepare the area. To ensure the ground is level, you will need paver base sand. Ensure you buy fill sand and not sandbox sand as it is much too fine. You will need a 50lb bag for every 8sq.ft. of patio surface.
It helps to compact the sand as much as possible to add more stability and even out the ground so the ground can be leveled easier.
3. Paver Panels
You will need paver panels to complete the base of the patio. Divide the square footage you want your patio to be by the square foot coverage of each panel to get the number of panels you will need. If your patio has an irregular shape, you need to buy 20% more panels to ensure you have enough to cover the entire patio.
4. Paver Edging For Fastening Pavers
You will need paver edging to hold the paving bricks in place along the edges of the patio. You can find easy-to-use, inexpensive plastic paver edging at most landscape supply stores and home centers or buy the special screws that the Gator brand sells; it can attach the edging directly to the plastic paver panels.
5. Polymeric Joint Or All-Purpose Sand For Between The Pavers
Some manufacturers of paver panels prefer that to fill the joints between the pavers with polymeric sand. The polymeric sand helps keep the pavers together while giving a maintenance-free joint that drains the water well.
If you are using polymeric sand, follow the instructions carefully to avoid issues like discoloration of the pavers and other problems. You can use all-purpose sand if you don’t want to use polymeric joint sand.
6. The Paver Bricks Or Stones
Be sure to buy the right kind of pavers for your patio floor. There are paving stones or bricks that are better suited to use as patio flooring when you are using paver base panels underneath. You get stunning paver stones that will give you an effortlessly elegant look.
Steps To Installing The Paver Brick Patio Base
Now that you have all the materials you will need to get the job done, its time to install the paver brick patio base; here is a step by step guide:
Step 1
Before you get started, you need to do some planning. Mark the area and shape where you want to build the patio with paint (spraypaint works fine) or string. Measure the length and width to know how much material to buy.
Step 2
You need to take off the top layer of soil. You don’t need to dig; just remove the grass and (3/4-inch) soil. It’s important to remove the topsoil evenly as you won’t use gravel to fill in the gaps. You can rent a sod cutter to help keep things even.
After removing the grass and topsoil layer, you must tamp (compact) down the soil. Tamping down the soil compacts the ground and lets out all the air so your patio pavers won’t wobble or sink when you step on them.
Using a plate compactor to tamp down the soil makes it easier to get the ground even as there shouldn’t be more than a ½-inch variation in flatness across the area.
Step 3
After you have tamped down the soil, you need to put down a layer of landscape fabric. The fabric is a barrier, so the sand and soil won’t mix. It’s important to spread the fabric out evenly.
Step 4
When the landscape fabric is in place, you need to lay down the polymeric or all-purpose sand. Spread the sand out evenly, so it covers the entire patio area. It should be at least ¾-inch deep. Now screed the layer of sand, so it gives a properly sloped flat surface for the paver base patio panels.
Step 5
The next step is to lay the paver patio base panels over the flattened sand. The panels usually come with a shiplap or tongue in groove edges to fit together flush and tightly. If you use paving bricks or stones that vary in thickness, you will need to add a layer of thin sand on top of the panels so the stones or bricks can level out.
Step 6
Install the paver edging to the edges of the panels. Ensure the panels are securely fastened together. It’s the perfect opportunity to see if the patio panels are level.
Step 7
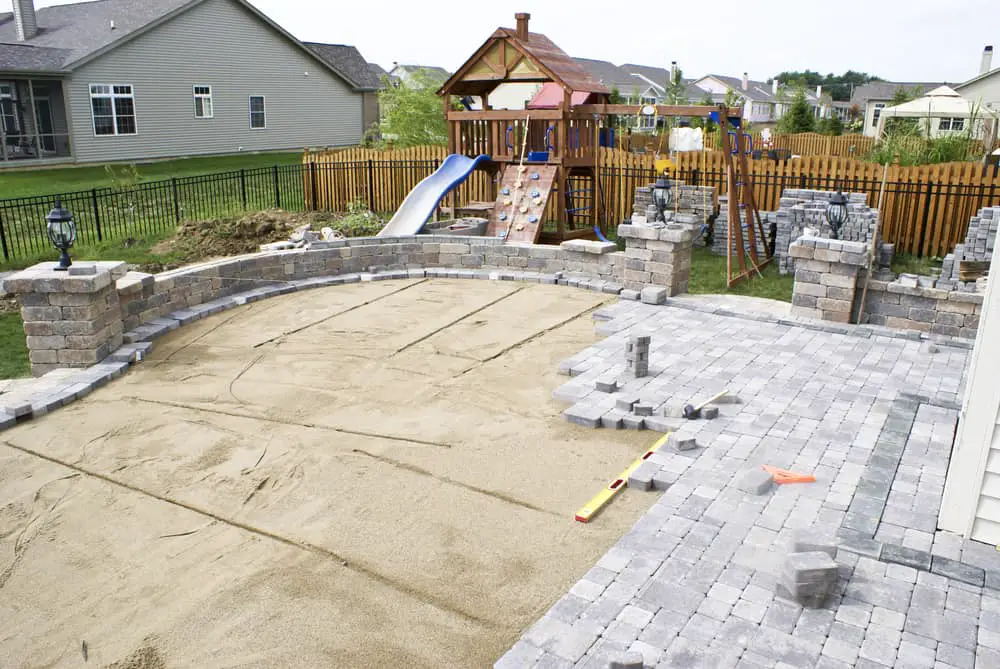
Now you lay your paver stones or bricks out as you normally would over a traditional gravel base. You don’t need to worry about disturbing or messing up the leveled sand as the base panels cover it.
Step 8 (Optional)
If you want to give the patio you just built a beautiful finish, you can install borders on your pavers. Keep in mind that installing a patio without digging means the patio base will be raised and not flush with the ground. So adding borders will give the patio a finished and professional look.
Difference Between Paver Base Patio Panels And A Gravel Base
The traditional base for stone or paver patios requires you to dig out and remove 6-inches of soil. For example, if you build a 10 x 12ft patio, you would have to remove 2 ½ tons of soil. Then you replace the soil with the same amount of gravel.
You don’t need to dig when using the paver base patio panels. You only need to remove the topsoil layer of grass and get the ground level. The plastic base panels take the place of the heavy gravel and last decades. These panels have grooves, so they fit tightly together. Paver base patio panels are easy and much less labor-intensive to install.
Paver base patio panels are lightweight, but they distribute the weight of the pavers evenly, creating a stable base for whatever you place on top, like tables and chairs, etc. Meaning you won’t need to worry about the patio shifting or sinking. The panels are very durable because they are made from plastic and will last decades.
Benefits Of Installing Paver Patio Panels
Installing pave base patio panels instead of using the usual gravel base has many benefits:
- There is less digging because you only remove the grass and topsoil.
- You don’t have to fill with heavy gravel.
- You save money on digging and hauling.
- You will save time because you don’t need to excavate the ground.
- Your landscape won’t be damaged by heavy hauling and excavating equipment.
- It’s works perfect for building patios with limited access.
- The screeded sand is protected by the panels while you are laying the pavers.
- It is a project you can do on your own; you don’t need to hire contractors or expensive equipment.
Tips For Installing Paver Base Patio Panels
Anyone using paver base patio panels for the first time can do with a few pointers. Here are some tips to help get the best result:
- Planning the layout size of your patio and marking it with paint or strings will help you buy the right amount of base panels, so you don’t run out before you are finished.
- You must ensure the ground is firmly compacted (tamped down) before laying the base pavers, or your patio paver stones will sink, and the floor will be bumpy and uneven.
- Check the soil for wetness before you compact it. If you try to compact the soil when it’s wet, you will have a muddy mess, and as the soil dries, it will change the stability of the soil. You need to wait for the soil to dry before tamping it down.
- Don’t lay more than 1-inch of sand over the landscaping material, or the sand will settle and wobble, leaving you with dips in your base.
- When laying the paver stones or bricks, no four corners must meet. You can create a design to compensate, but if four corners meet, you compromise the stability of the patio.
- Avoid laying the pavers in long linear lines. If the joins are over 9 feet long without breaks in the pattern, your patio will sink and become uneven.
- Ensure you use landscape fabric that is non-woven so the water will drain when it rains, not make puddles that will compromise the structural integrity of the patio.
- Remember that the patio surface should slope slightly away from any building or structure so water won’t pool.
- You can use a wooden board or plank to level the sand before laying down the base patio panels.
Conclusion
Building a patio can be labor-intensive and frustrating, but you can build a patio in no time by using patio paver base panels. It will save money because you won’t have to dig a big hole or pay to get gravel delivered. It is a raised patio, so you should consider adding a border to finish the look.
You don’t need any heavy equipment or power tools to get the project done. Using patio paver base panels is a much easier project for first-time DIYers to take on than building a standard patio. I was pleased with the patio we built using this method, and I would highly recommend it as an alternative to a traditional gravel base patio.