How Far Should A Freestanding Bath Be From The Wall?
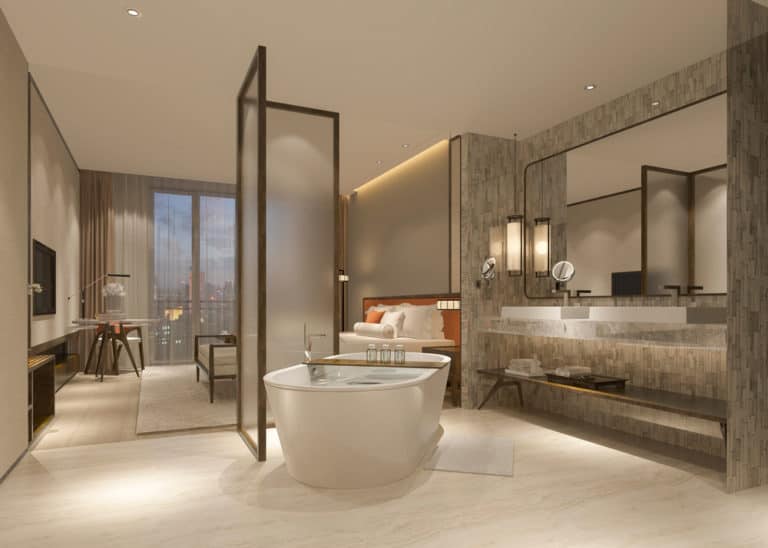
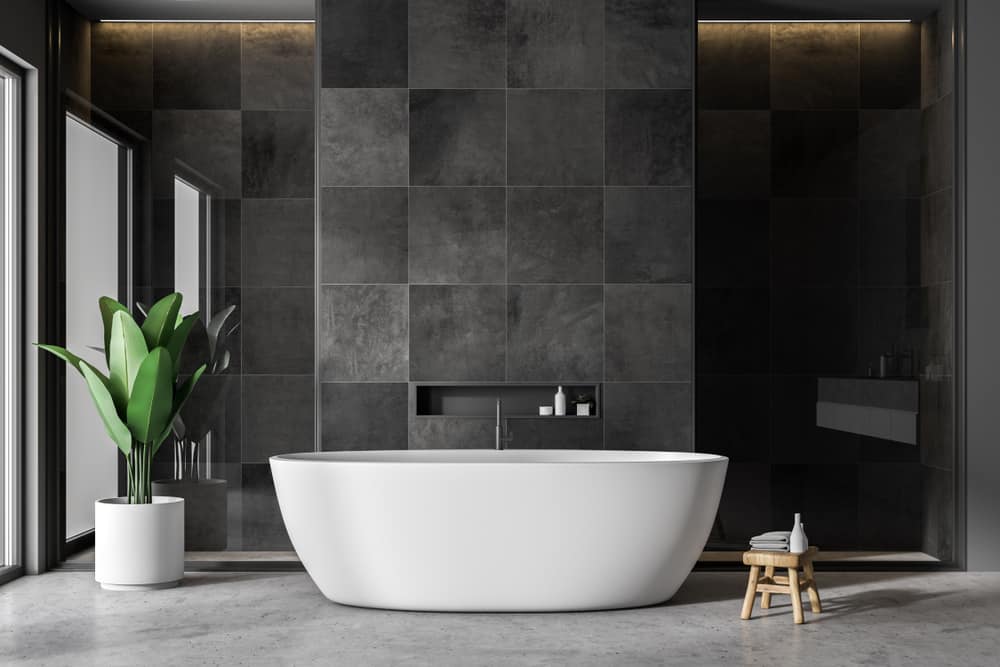
As far as baths are concerned, we observe two types. The built-in bath we all know and grew up with is usually placed inside an alcove with walls on its three sides. The built-in bath is only exposed from the front. On the other hand, the freestanding bath is only connected to the floor.
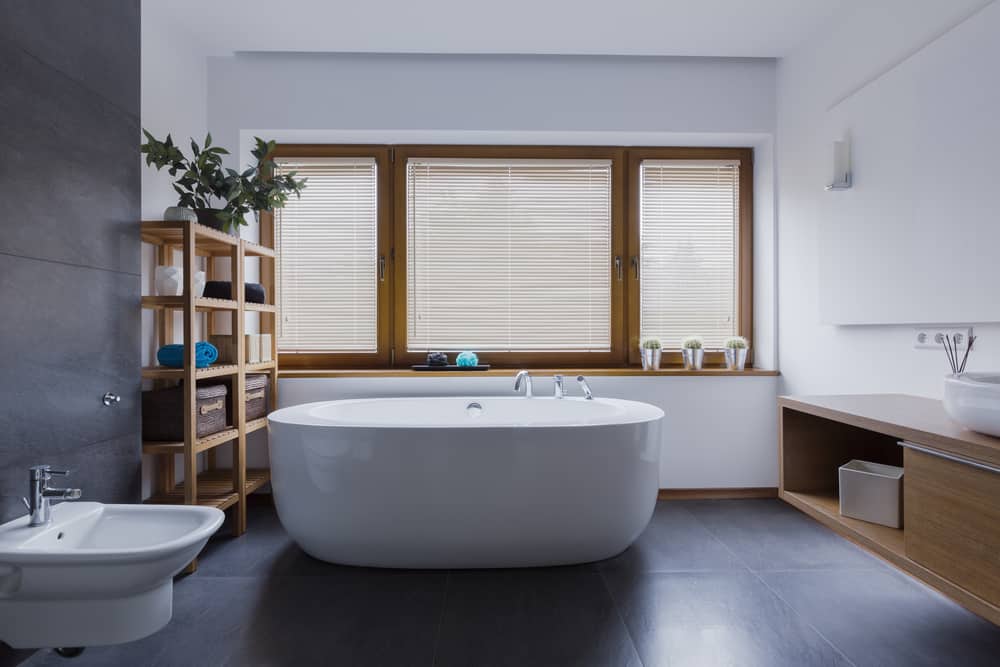
Ideally, the space between the freestanding bath and the wall should be at least a foot wide. Remember, however, that free space around the bath is meant to make the bathroom look spacious. You could do with 2 or 3 inches of space when installing a freestanding bath in a small bathroom.
Considering the minimal distance between a freestanding bath and the wall is crucial for people with limited bathrooms space for two reasons. Firstly, space makes a freestanding bath, and the room around it seems less cramped. Secondly, space makes access for cleaning easier. I’ll show you various ways to tackle the limited-space issue successfully.
How Far Should A Freestanding Bath Be From The Wall?
With an average freestanding bath length of 55 inches to 72 inches, one needs to look at the available room space. The ideal required space around the bath is at least a foot wide. Smaller bathrooms may allow 2-3 inches of space around the bath, which may be acceptable, depending on the overall size of the room and the size of the bath.
Getting a freestanding bath makes perfect sense when striving to have a lovely, luxurious-looking bathroom. Far from being wasteful space takers, well placed and correctly apportioned freestanding baths of the right size will enliven one’s bathroom. In addition, freestanding baths make the bathroom seem larger.
Traditional baths are built to attach to a bathroom wall, exposing one or two tub sides within an enclosure. Freestanding baths are placed at a distance from the walls. This means that the bath may be placed in any comfortably fitting space in the room. This adaptability offers users huge advantages regarding the size and type of bath they may use.
Why Choose A Freestanding Bath
Before we look at the challenge of installing a freestanding bath in a small or medium-sized bathroom, let’s view the reasons for choosing a freestanding bath, an unconventional but increasingly popular bathroom fixture. Choices are related to style and variety of choices, and, sometimes, the desire to showcase beautiful windows or unique tiling.
Style is another reason to get freestanding baths. Colors include stone paint colors, like brown, white, red, and black, while fiberglass, acrylic, or porcelain baths colors include blue, purple, tan, or metallic. Baths are made of various materials, including porcelain, acrylic, fiberglass, cast iron, and cast polymer.
Freestanding baths come in various shapes: round, hourglass, slipper, square, and, most popular, oval. Baths are also available in various sizes: Length, 55 to 72 inches, width, 27 to 32 inches, and height of 15 to 20 inches. With such a vast number of choices, one can seek and find the exact freestanding bath they want.
Trying To Fit A Freestanding Bath In A Small Bathroom
When trying to fit a freestanding bath in a small bathroom, one needs to question the way bathrooms are traditionally designed, with all major fixtures and furniture pushed out to the walls, leaving some free space in the middle. Mass-produced, standard-sized items backed this interior design.
Designing to set dimensions was cost-effective and simple to install. It also kept one’s creative thinking at bay. Good quality fixtures and cheap furniture, easy to obtain and install, voided over-thinking. However, with time, people sought to make their homes look more personal and unique within the size constraints and budgetary limitations.
The first action on one’s to-do list is to measure and map the exact dimensions of the bathroom and the location of all fixtures, fittings, and furniture. Freestanding baths require similar plumbing to standard baths – hot and cold water fed into the bath and a waste pipe linked to the drain. The location of the bath may require additional plumbing.
Once you have measured and mapped your bathroom, look for a potential location for the freestanding bath, and measure this location, keeping track of its exact dimension. Remember that the bath will require some space around it for aesthetic reasons and access and cleaning.
When shopping for your freestanding bath, use your bathroom measurements to find the right bath size. You will be looking for a bath whose length, width, and height fits the allocated space in your bathroom, leaving around the bath a minimal space that is 3 inches wide. It is also worthwhile to move away from the standard interior design principle here.
The first principle to ditch is the traditional positioning of baths next to the wall. Since the freestanding bath will have dedicated plumbing wherever it is installed, you can place the tub to fit the allocated space. For example, the bath may be positioned diagonally inside the allocated space rather than parallel to the wall.
The point for consideration relates to the bath’s dimensions. Some freestanding baths are deeper, which means that you can opt for a shorter, deeper bath that fits the available, limited space and can still offer you a deep, full-body soaking. Thirdly: the ideal freestanding bath fulfills both esthetic and practical requirements.
Lastly, a popular device used to make the freestanding bath seem less bulky, as it fits your limited bathroom space, is the clawfoot bath. To many, the term “freestanding bath” conjures the image of a bath resting on four feet resembling claws. Modern designs replaced the bath’s cast iron and porcelain with fiberglass or acrylic but kept the claws.
A clawfoot bath is lifted about 15 inches off the floor, showing the wood or tiles underneath. Aside from the practical aspect of the space between the bath and the floor, including ease of cleaning and maintaining, a clawfoot bath makes the freestanding bath and its surroundings seem pretty spacious.
Hiding The Ugly Plumbing That Congests My Limited Space
Having conquered one’s limited space wisely, they can install their freestanding bath and enjoy soaking in it. If one has a window that points to some beautiful view, the experience will be enhanced further. Space issues will only arise when necessary to clean or maintain the bath. The last thing to consider is unsightly, space-filling bath plumbing.
Even if the pipes are only exposed between the underground pipes and the taps, they may still dampen the excitement of creating a great indoor environment for pampering, cleanliness, and distress. A sure and simple way to eliminate this eyesore is to use two readily available devices.
To avoid unsightly pipes spoiling the installation, use a shallow seal bath trap. This is a solid metal pipe with a compression outlet, allowing the waste to flow directly from the freestanding bath to the drain. The pipe is made from different materials, such as solid brass finished in chrome, making it look shiny and bright.
To improve the look of the inflow water pipes, one can use bath shrouds, sometimes called standpipes or pipe shrouds, which are metal jackets used to cover ugly tap pipes with a shiny layer. The shallow seal bath trap and the pipe shrouds add to the distinct look of the freestanding bath while adding a layer of protection around the pipes.
Conclusion
‘Old’ baths were mass built-in various standard sizes and types, installed following demands from mass builders and developers. They were attached to a wall or built into alcoves with walls around three sides of the bath. All other furniture, fixtures, and fittings were also attached to the walls.
Freestanding baths offer a different experience because they are not connected to any part of the room other than the floor. This allows the unit to use as much space as is available, offering a sense of spaciousness, making even small bathrooms seem large. One can install a freestanding bath using creative placement techniques even in small bathrooms.
References
- https://www.thespruce.com/best-bathtub-material-2718999
- https://www.hunker.com/13726840/freestanding-bathtubs-what-you-need-to-know
- https://www.hgtv.com/design/design-blog/design/freestanding-tubs
- https://tr-construction.com/how-to-fit-a-freestanding-bathtub-into-a-small-bathroom/
- https://victoriaplum.com/blog/posts/how-to-measure-for-a-bath
- https://www.hgtv.com/design/rooms/bathrooms/high-tech-showers